Understanding Electric Fence Connector Types: A Comprehensive Guide
When it comes to setting up an electric fence, understanding the various connector types and their installation methods is crucial for achieving optimal performance. Electric fence connectors are essential components that link different parts of the fencing system, ensuring a steady flow of electrical current. Let’s explore the various types of electric fence connectors and share some valuable installation tips to help you get it right the first time.
Common Types of Electric Fence Connectors
There are several kinds of connectors available, each designed for specific applications within an electric fence setup. Below are the most commonly used types:
- Cable Connectors: These are used to connect the main fence line to the energizer. They usually come in fork, ring, or spade styles, which help create a secure connection with minimal resistance.
- Insulated Connectors: These connectors prevent electrical leakage by insulating the connection point from the ground. They are particularly critical for areas with high moisture to ensure safety and efficiency.
- Ground Rod Connectors: These connectors link the ground rod to the electric fence system. They are vital to promote safety and proper functioning by channeling excess electricity safely into the ground.
- Interconnectors: Used for linking multiple fence wires together, interconnectors are essential in building a continuous circuit throughout the length of the fence.
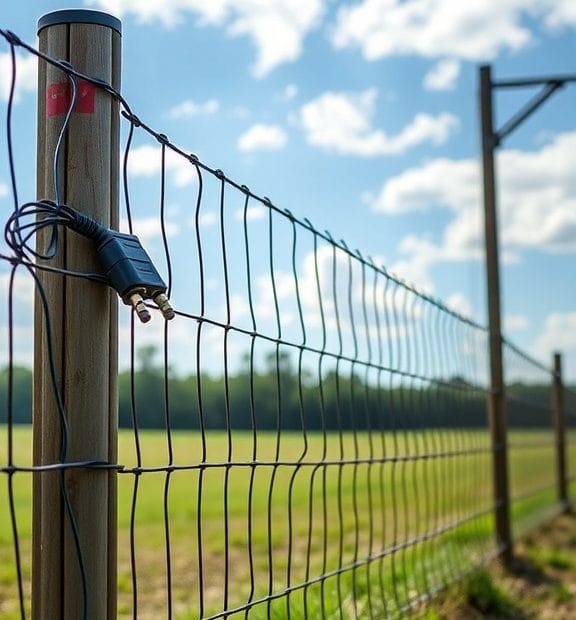
- Post Connectors: These are specifically designed to connect wires to fence posts, making them an essential part of any electric fencing setup.
Choosing the Right Connector
When selecting the appropriate connector for your electric fence, several factors come into play. These include:
- Material Compatibility: Look for connectors made from durable materials, such as stainless steel or copper, to prevent corrosion over time.
- Voltage Rating: Ensure that the connectors you choose can handle the voltage output of your energizer. Mismatching cables and connectors can lead to inefficient performance.
- Environmental Conditions: If your electric fence is located in a wet or humid environment, it’s crucial to use insulated connectors to prevent electrical loss.
Installation Tips for Electric Fence Connectors
Proper installation of electric fence connectors can make all the difference in performance and longevity. Here are some key tips to keep in mind:
- Start with a Plan: Before installing your connectors, sketch out your fence layout. This helps identify where connectors will be needed, from the energizer to the ground rods.
- Use Quality Tools: Make sure you have wire strippers, pliers, and a multimeter on hand. Quality tools ensure a secure, efficient installation.
- Clean Connection Points: Always clean surfaces before connecting wires. Rust or dirt can impede the flow of electricity, negating your efforts.
- Check Tightness: After connecting, double-check that all connectors are tight. Loose connections can lead to inconsistent electrical flow, making your fence less effective.
- Test the System: Once everything is connected, test the system with a voltmeter to ensure that everything is working properly. This step can save you time and potential problems later on.
Maintenance of Electric Fence Connectors
Regular maintenance is necessary to keep your electric fence functioning optimally. Check connectors periodically for wear and tear, and replace any corroded or damaged parts immediately. Clean connection points regularly to avoid electrical resistance, and always ensure that ground connections stay secure and dry.
Investing the time to understand electric fence connector types and following these installation tips will help you establish a reliable electric fence system. Whether you’re managing livestock or ensuring the safety of your property, a well-installed electric fence can provide peace of mind and security.
Essential Tips for Installing Electric Fences Safely and Effectively
Installing an electric fence can be a great way to enhance security and manage livestock. However, proper installation is key to ensuring safety and effectiveness. Here are some essential tips to guide you in the process.
Choose the Right Location
Before you start installing your electric fence, it’s important to select a proper location. Consider the following:
- Survey the Area: Walk around your property to determine the best paths for the fence. Look for trees, bushes, or buildings that might interfere with the structure.
- Check Local Regulations: Ensure you comply with local zoning laws or regulations that might affect where you can place your fence.
- Plan for the Future: Visualize changes to your property that might require adjustments to your fence later on.
Opt for Quality Materials
The materials you choose for your electric fence can make a significant difference in its durability and effectiveness. Here are some recommended materials:
- High-Tensile Wire: This type of wire is highly durable and ideal for electric fences.
- Insulators: Use high-quality insulators to prevent electricity leakage and ensure a strong electric current.
- Fencing Posts: Select sturdy posts made from treated wood, steel, or fiberglass. Ensure they can withstand weather conditions.
Understand the Electric Fence System
The electric fence system consists of various components that work together. Familiarize yourself with these parts:
- Power Source: This could be a battery, solar panel, or a plug-in charger. Choose one based on your location and power availability.
- Controller: The controller regulates the voltage sent through the wire. Ensure it matches the requirements of your fence system.
- Grounding System: Proper grounding is critical for your system’s performance. Use grounding rods to establish a good ground connection.
Installation Steps
Now that you have your materials and know your system, it’s time to start the installation. Follow these steps carefully:
- Mark the Fence Line: Use stakes or flags to outline where the fence will go. This will help you visualize the layout before digging.
- Install Posts: Dig holes for the posts at appropriate intervals. The spacing typically ranges from 10 to 20 feet depending on the design and height of your fence.
- Attach Insulators: Once the posts are set, install insulators on the posts where the wire will connect. Make sure they are installed securely.
- Run the Wire: String the wire through the insulators, keeping it taut but not overly tight. Ensure there are no sharp edges that could fray the wire.
- Connect the Power Source: Attach the controller to your power source and the grounding system, following all instructions provided by the manufacturer.
Test the System
After the installation, it’s crucial to test your electric fence to ensure everything works as it should:
- Check Voltage: Use a voltmeter to measure the voltage along the wire. It should be consistent and within the recommended range.
- Inspect for Shorts: Walk the length of the fence to identify any areas where the wire may be touching vegetation or other objects causing shorts.
Maintain Your Electric Fence
Regular maintenance is necessary to keep your electric fence in top working condition. Consider these tips:
- Regular Inspections: Check the fence periodically for wear and tear, and address any issues immediately.
- Cleansing Vegetation: Keep the fence line clear of shrubs and weeds that may touch the wire and disrupt the voltage.
- Check Grounding System: Inspect the grounding system annually to ensure it remains effective.
Installing an electric fence can be an efficient solution for securing your property and livestock. By following these tips and understanding the components involved, you can successfully set up and maintain an effective electric fence system.
Conclusion
Choosing the right electric fence connector types and installing them correctly are essential steps for creating an efficient and safe electric fencing system. By understanding the various connector types available—such as wire connectors, terminal connectors, and plug-in connectors—you can select the best option for your specific fencing needs. Each type plays a crucial role in ensuring that your electric fence operates optimally, providing the necessary deterrent for unwanted visitors while maintaining the safety of livestock.
When it comes to installation, following essential tips can make a significant difference in the effectiveness of your electric fence. Always ensure that your connectors are properly insulated to prevent short circuits, and take the time to secure connections tightly for a reliable performance. Additionally, positioning your fence in a way that minimizes contact with vegetation or moisture will enhance durability and functionality. Regular maintenance checks are also vital; they help identify any loose connections or damages early on, ensuring that your fence remains reliable throughout its use.
By understanding these components and installation techniques, you empower yourself to create a strong, efficient electric fencing system. With careful selection and proper setup, you balance safety, functionality, and durability, allowing you to manage your property confidently. Always remember that a well-installed electric fence not only protects livestock but serves as a valuable asset for any rural or semi-rural property owner.