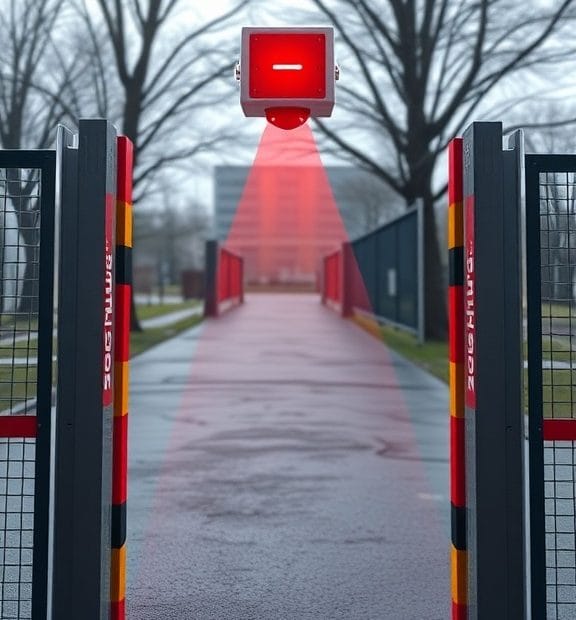
Step-by-Step Guide to Automatic Gate Loop Detector Installation
Installing an automatic gate loop detector can significantly enhance the functionality and safety of your property. A loop detector helps identify vehicles approaching and can automate gate operations seamlessly. Follow this step-by-step guide to successfully install an automatic gate loop detector.
Gather Necessary Tools and Materials
Before starting the installation, ensure you have all the needed tools and materials. Here’s a checklist:
- Automatic gate loop detector
- Inductive loop wire (usually 14-16 gauge)
- Electric conduit and connectors
- Concrete saw or jackhammer
- Shovel
- Wire stripper
- Electrical tape
- Multimeter
- Safety goggles and gloves
Select the Installation Location
Choosing the right location for your loop detector is crucial for its effectiveness. Follow these guidelines:
- Install the loop detector in the area where vehicles will arrive before the gate.
- Avoid areas with heavy foot traffic to reduce false activations.
- Consider the distance from the gate to ensure quick detection.
Create the Loop
To create the loop effectively, you will need to cut through asphalt or concrete. Here are the steps:
- Mark the area where you plan to install the detector. A rectangular shape is ideal, with the loop being approximately 3-4 feet wide.
- Using your concrete saw or jackhammer, create a channel in the ground. Make sure the groove is deep enough for the loop wire. Typically, 1 to 1.5 inches is sufficient.
- Ensure the ends of the loop meet so the wire can form a complete circuit.
Install the Loop Wire
Now it’s time to lay down the wire. Here’s how you can do this:
- Feed the loop wire into the groove you created. Make sure it is laid out in a continuous loop.
- Leave some slack at each end to allow for connections later.
- Once the wire is in place, use electrical tape to secure it temporarily until the groove is filled.
Connect the Loop Wire
After installing the loop wire, you will need to connect it to the automatic gate loop detector. Follow these steps:
- Strip the ends of the loop wire and connect them to the terminals on the loop detector. Typically there are two terminals labeled “A” and “B”.
- Ensure that the connections are tight and secure to avoid any signal loss.
Install the Loop Detector
With the loop connected, the next step involves mounting the loop detector:
- Find an appropriate location for the loop detector, usually near the control box of the gate.
- Use screws or appropriate fasteners to secure the detector in place.
- Connect the power supply to the loop detector according to the manufacturer’s specifications.
Test the Installation
After everything is installed, testing is crucial. Here’s how to do it:
- Power on the gate system and check the loop detector’s functionality.
- Drive a vehicle towards the loop to see if the gate opens automatically.
- Adjust sensitivity settings if needed, based on how quickly the detector responds.
Cover the Loop
Now that everything is working correctly, it’s time to complete the installation:
- Fill the groove with the appropriate material, usually asphalt or concrete.
- Ensure the surface is smooth and matches the surrounding area to prevent tripping hazards.
By following these steps, you will enhance the convenience and efficiency of your automatic gate system. Proper installation ensures reliable performance, making your property safer and more accessible. With patience and focus, you can successfully install an automatic gate loop detector and enjoy the benefits it brings.
Common Issues and Solutions for Automatic Gate Loop Detectors
Automatic gate loop detectors are essential components for ensuring the smooth operation of automated gates. However, like any technology, they can encounter issues that may disrupt functionality. Understanding common problems and their solutions can help you maintain your system effectively. Let’s dive into some frequent challenges users face with automatic gate loop detectors and their remedies.
Faulty Sensitivity Settings
One common issue is the sensitivity setting of the loop detector. If the detector is too sensitive, it may trigger erroneously, causing the gate to open unexpectedly. Conversely, if it’s not sensitive enough, it may fail to activate the gate when a vehicle approaches.
- Solution: Adjust the sensitivity settings based on the manufacturer’s guidelines. Begin at a moderate level and test the gate’s response with various vehicle sizes. Fine-tune until you achieve reliable performance without false alarms.
Damaged Loop Wires
Loop wire damage is another frequent issue impacting gate performance. Cuts, frays, or shorts in the wire can lead to intermittent or total failure of the detector. Environmental factors like moisture or heavy vehicle traffic can exacerbate this problem.
- Solution: Inspect the loop wiring regularly, especially after heavy rains or severe weather. Look for visible damages and replace any faulty wiring. Ensure the loop installation remains secure and protected from external elements.
Incorrect Placement of Loop Detectors
Improper placement of the loop detector can cause inaccurate readings. If it’s too close to edges or in the wrong position, the system may not detect vehicles as intended.
- Solution: Verify the installation position of the loop detector according to installation guidelines. The loop should be installed within the path of the approaching vehicle. Consult with a professional if you’re unsure of the correct positioning.
Alignment Issues
Misalignment during installation can lead to miscommunication between the loop detector and the gate control system. This can cause delayed responses or non-responsiveness altogether.
- Solution: Check the alignment of the loop detector with respect to the gate and the expected direction of traffic. Adjust as necessary, ensuring that the detector is level and facing the correct direction.
Electrical Interference
Electrical interference from nearby equipment can disrupt loop detector functionality. Machinery, radios, or other devices operating on similar frequencies may cause malfunctions.
- Solution: Identify and isolate sources of electrical interference. If possible, relocate the detector or the interfering equipment. Utilizing twisted pair cabling can also help minimize interference issues.
Power Supply Problems
A stable power supply is critical for the seamless operation of automatic gate loop detectors. Fluctuations or failures in power can lead to erratic behavior of the gate system.
- Solution: Regularly check the power supply connections and ensure they are secure. Consider using a power surge protector to safeguard against spikes in electricity.
Corrosion and Environmental Damage
Over time, moisture and outdoor conditions can cause corrosion on connections, affecting the system’s reliability. Corroded components can lead to failures in detecting vehicles.
- Solution: Inspect and clean the connectors periodically. Use waterproof connectors and protective measures to shield the installation from harsh weather conditions.
Software Glitches
Many modern loop detectors include software components. These can sometimes experience bugs or glitches that affect operational efficiency.
- Solution: Keep the loop detector’s software up to date, following manufacturer recommendations for updates. If issues persist, consider resetting the system to restore functionality.
Regular maintenance and proactive troubleshooting are key to keeping your automatic gate loop detectors in good working order. By being aware of these common issues and implementing the suggested solutions, you can ensure your gate operates smoothly and reliably, providing security and convenience for your property.
Conclusion
Successfully installing an automatic gate loop detector can significantly enhance the efficiency and safety of your automated gate system. By following the step-by-step guide outlined earlier, you can confidently tackle the installation process. Remember to choose the right location for the loop and ensure proper connection to the gate’s control system. This attention to detail not only assures a seamless operation but also prolongs the lifespan of your equipment.
However, even the best installations may encounter issues over time. Understanding common problems, such as sensitivity settings and interference from environmental factors, is crucial for troubleshooting. Knowing how to adjust or recalibrate your detector can save you from costly repairs and provide peace of mind. Regular maintenance checks are an excellent way to preemptively address issues before they disrupt the functionality of your gate.
Ultimately, whether you are a DIY enthusiast or a seasoned professional, equipping yourself with knowledge on installation and potential setbacks will enhance the experience and effectiveness of your automatic gate loop detector. Remember, investing the time to learn and apply the right techniques will not only simplify the installation process but will also contribute to a safer and more reliable automated gate system. Let’s ensure your gates do more than just open and close; they should work intuitively and efficiently, offering security and convenience for years to come.